
e a s y ][ 45 minutes
cost: $5-10
shop at: craft and fabric stores, places that sell accessories
read: the instructions once though before you get started
also consider reading the instructions from my statement bow cuff tutorial to review folding techniques
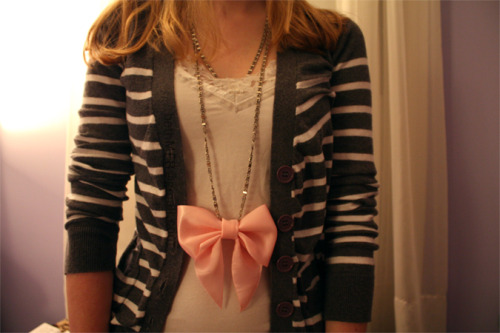
A fabulous standout piece. Just like the statement bow cuff, it's not an ordinary shoelace bow. All it takes is a simple 3 shapes and a chain.
SUPPLIES
- template pieces, cut out
click here to download the template
- ability to sew whip stitches
(google it if you don't know how)
- necklace chain with a clasp
- twenty inches of 3" grosgrain ribbon that looks the same on both sides
- sewing needle
- thread in a color that's similar to the ribbon
- scissors or xacto knife
- bottle of fraycheck or clear nail polish
- ruler
1. Lay out the ribbon on your workspace. Lay the 3 pattern pieces over the ribbon.
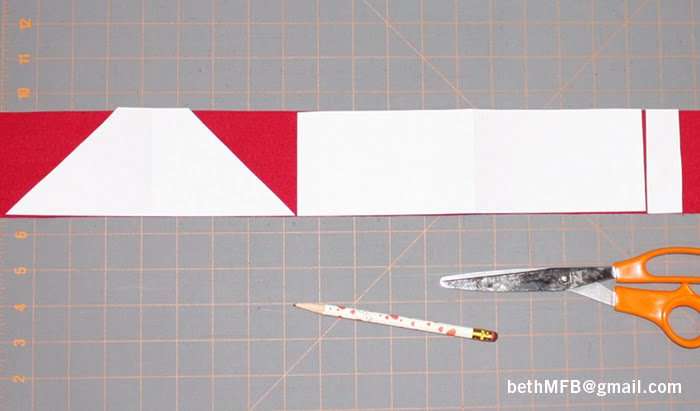
2. Cut out the 3 shapes with your scissors or, a ruler and xacto. I use a rotary cutter. This should take 6 cuts, total.

3. Lightly dab all 6 edges that you cut with fraycheck or clear nail polish. This will keep the edges from unravelling. Let dry.
4. Fold the top piece in half, hamburger style. Whip stitch it together down the open side.

5. Move the stitches to the center back. Set aside.

6. Now it's time to fold the ribbon, to create the bow shape. It's a little confusing, but don't worry, once you do it, you'll be able to do it again and again.
7. Take the bottom piece, and fold the top down so it touches the bottom edge. Then, fold the top half up again, onto itself. Flip over, and fold the bottom half onto itself. Place something on top of it so it stays still while you move to the next step.

8. Take the top piece that you just finished sewing, and fold it just like you did in step 6. It will look different since the bottom is a trapezoid and the top is a rectangle, but the folds are the same.

9. Thread your sewing needle again. Pick up the bottom piece, and poke a hole through the middle, bringing the thread through up to the top.

10. Poke another hole through the middle of the top piece. Make sure both pieces are facing forward. Tighten the thread to pinch the top and bottom pieces together. Cut and tie the thread. If it looks loose, that's ok, we haven't added the "knot" yet.

11. Grab the third and final piece. Wrap it around the center of the bow, covering where you strung them together. Whip stitch it closed, like you did with the big top piece in step 4. Spin the knot so the stitches are in back.

12. Open the chain and string it through the top of the knot. Done!

TIP: Practice by folding paper first if you like. It won't look like the ribbon version when you're done, but you'll understand how the folds work together.
ALTERNATIVE IDEAS:
- Clip extra necklaces or pins/rings on your chain to give it a draped look
- Slide/stitch extra smaller ribbons or decorations through the bottom of the knot
- Instead of a chain, you could use ribbon, beads, or string
- Experiment with different types/sizes of ribbon or materials
- Skip the bottom trapezoid piece for a plain bow-tie look, or keep bottom piece loose so you can wear it with or without
be sure to check out my other projects!


DIY #12
♥ I worked really hard on this tutorial. It took a long time to prepare.
I wrote out these instructions and took the photos.
So if you see this anywhere else, it's not the original.
1/27/11
This looks amazingg! (:
ReplyDeletehah cool!!!
ReplyDeleteAmazing! It's so pretty!
ReplyDeletethat's so cool I'm going to try this very soon :)
ReplyDeleteoh my gosh.. i'm gonna try this!
ReplyDeletelove it. im going to do this. i always wanted a bow necklace and now i don`t have to make one. thanks a lot! :-)
ReplyDeleteI just did this with denim leftovers from cutting my jeans, its a bit harder but looks great thankyou!
ReplyDeleteIt's so cute, I've just tried it with black lace tape and it came out lovely! Thanks for sharing!
ReplyDeleteThis is very helpful. Thanks!
ReplyDeletevery very difficult but i think its cute :D
ReplyDeletewhere is polyvore?
adorable!
ReplyDeletei tried it, its great . <3
ReplyDeleteOmg This is so cute <3
ReplyDelete