reblog on tumblr
reblog on tumblr

m e d i u m ][ 2 hours
cost: about $4 per clutch
shop at: your house, craft or fabric stores
read: the instructions once though before you get started
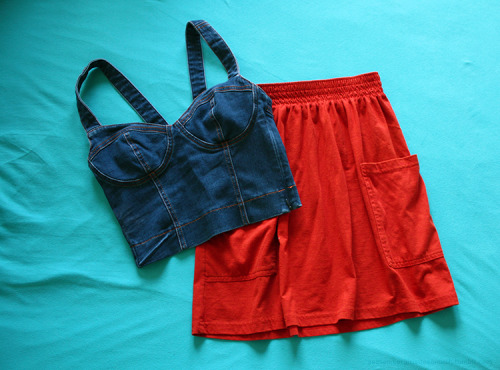
I wanted a neon clutch this summer, but I didn't feel like dishing out $50+ for one, and I didn't feel like sewing. This is what happened.
SUPPLIES
- template pieces and guide, printed
click here to view/download the template
- 2 sheets of 12x18" craft foam for one clutch
(I use "Foamies" brand. Their value packs are sweet, haha.)
[note: if all you can find is 9x12", get 4 sheets. you will have to rearrange the template but it's totally possible]
- 1 roll of double sided tape
(makes about 3 clutches. I use the kind 1/4" kind they put in the craft foam section. You cut it, place it, then when you're ready, peel up the paper to make it sticky on both sides)
- experience with with scissors or xacto knife
- scissors or xacto knife
- ruler
- scotch tape
- pencil
- cutting mat or hard surface to work on

THE TEMPLATES
1. Cut the blue part of the template pieces off, leaving the white and grey. You will have 6 rectangles, which we will make into 2 bigger rectangles.

2. The last page has loose shapes, cut those out individually and set aside.

3. Tape the first 4 rectangles pieces together, a little bit of tape on the front to help you align, and lots of tape on the back to hold things together. You may need to trim the inner gray edges to align things correctly.

4. Repeat for the other two rectangle pieces.

5. Cut out all the shapes like you did in step 2. Be careful not to cut piece A in half! It has a fold line near the middle, not a cut.

THE FOAM
6. Arrange the templates on the foam, using the guide for reference. (The D's in the photo will look slightly thicker than what you have in front of you, I had to adjust the template. No worries!)

7. Trace the shapes lightly in pencil.

8. Cut out all the shapes.

THE CLUTCH
9. Get all the A, C, and D pieces.

10. Put double sided tape on both sides of all the D pieces.

11. Take piece C and attach D3, placing it along the top edge, like you're stacking papers neatly. Flip piece C over, and place double sided tape on the top and bottom.

12. Attach C to the top of Ai, again, lining it up.

13. Now to give the clutch thickness. Attach D1 and D2 to the upper sides, lining them up like you did with piece C.

14. Fold the bottom of Aii up to the lower edge of C. Can you see the clutch forming?


15. Find piece B, E1, and E2. Place piece B at the top, right over D3, keeping it lined up.

16. On E1, put two pieces of double sided tape on either end. On E2, put one long strip.

17. Place E1 on the front of the clutch, under B. I like to line up the bottom of E1 with the bottom of B.

18. Place E2 on the back, in about the same place as E1 on the other side.

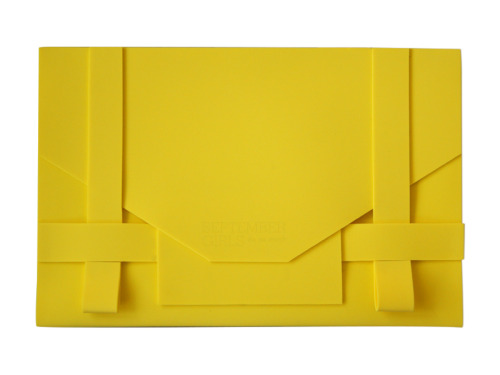
19. Grab F1 and F2. These are the closure straps. Arrange double sided tape in a T formation at the top of both.

20. Place both F1 and F2 about 1.5" from either side, lining up their tops with the top of the clutch.
21. I used G1 to make a funky little pocket at the front.

22. You can also apply a little more tape and create little loops on F1 and F2, which help them stay in place.

23. Done!
reblog on tumblr
TIP: Flatten your clutch under a heavy book overnight to help the double sided tape really adhere.
EXTRA PIECES: I imagined G1/G2/H to be buckles and pockets and corners, then didn't end up using most of them, but you can! Play with the extra shapes and scraps to style your clutch uniquely. I like the minimalist look, but you could definitely add stickers or drawings if you felt like it!
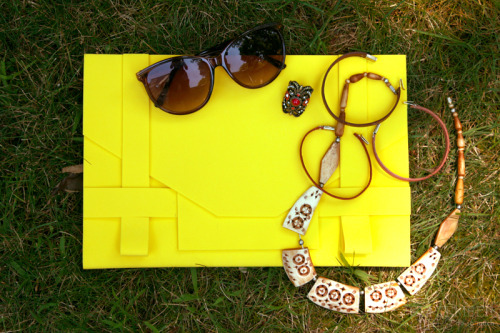
ALTERNATIVE IDEA: Tuck a necklace in, and voila, it's a purse!

BEHIND THE SCENES: I didn't dream up this exact design all at once. Here's the practice clutch and sketches I played with for hours on end:

Be sure to check out my other projects!
If you make one, feel free to post a photo on the September Girls Do So Much fan page!
DIY #14
♥ I worked really hard on this tutorial. It took a long time to prepare.
I wrote out these instructions and took the photos.
So if you see this anywhere else, it's not the original.
7/17/11