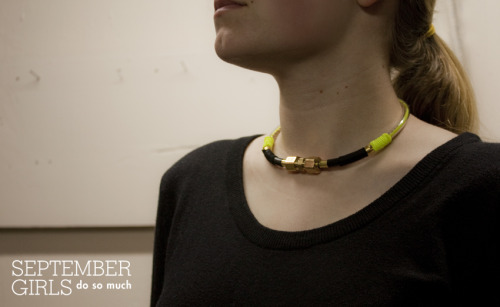
 reblog on tumblr
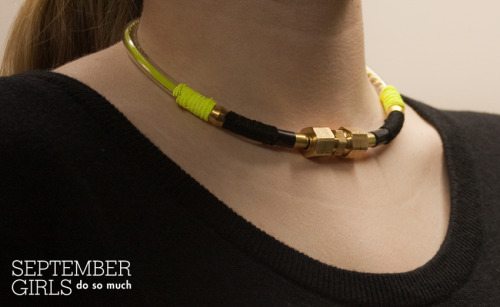 reblog on tumblr
m e d i u m ][ 2-3 hours
cost: $20 range
shop at: your house, hardware store, craft or fabric stores
read: the instructions once though before you get started.
Vinyl tubing is officially awesome, because not only can you wrap things around it on the outside, but you can slide things inside and still see them. This project is pretty relaxed because if you make a mistake or want to re-use the pieces for something else, it's really easy to take apart.
The supply list has lots of parentheses because some of the stuff is a bit weirder than usual.
SUPPLIES
- length of ball chain
(I think the one I used was meant for a bathtub drain, but you can also find it in the jewelry section of a craft store)
- plastic gimp
(The stuff you used at camp to make lanyards. I used fluro yellow)
- thin household string or embroidery floss
(I used black and white, then painted the white with a color. It'd be easier to get already colored string)
- neon acrylic paint
(if you want to paint over string like me. I used fluro yellow)
- 1/4" vinyl tubing
- compression unit
- compression sleeves
(They were all next to each other at Home Depot when I found them. A clerk will come over and help if you stand there staring for awhile, haha)
- double-sided tape (for the string wraps)
(scotch brand is good, or you can use the kind mentioned in my foam clutch tutorial)
- liquid household glue (for the string wraps)
- electrical tape or duct tape (I used black)
- scissors
- wire cutters (to cut the ball chain)
- ruler
- measuring tape
- small paintbrush
0. Unwrap and play with the pieces and get familiar with how they work for a few minutes.
1. Measure the circumference of your neck. Add 1" or so to that number. Or, you could take the measurement of a choker-style necklace you have and use that number.
2. Cut a piece of vinyl tubing at that length. (I noticed mine had some funny "NOT FOR ICE MAKER" text printed on it, decided to embrace it, but feel free to be picky and avoid that part when you cut your pieces.) Because it comes all wound up, it lends to the circular shape well.
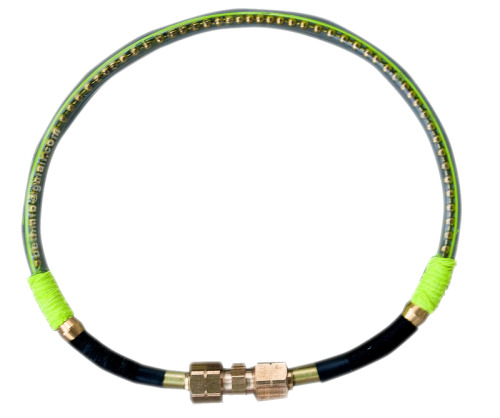
3. Attach one half of the compression unit to the end of the cut piece of vinyl tubing by sliding in the skinny bit at the end.

4. At the other end of the tube, feed in the ball chain and gimp. I believe I did one after the other, but it might be possible to send them in at once. This step can take a bit of time, but stick with it!

5. Trim the gimp and ball chain once it's all the way through and hits the compression unit. Slide on the compression sleeves (they look like beads, right?) and slide in the other half of the compression unit.

6. To finish up, wrap little pieces of tape around parts of the necklace, and doublesided tape (or glue) / string wraps as well. (If you remember the BHBN tutorial, these string wraps are a lot like those.) I find that paint worked well on the string but not so much on the other surfaces.

7. Doneski! The compression unit is the fastener of the necklace.

BONUS BRACELET
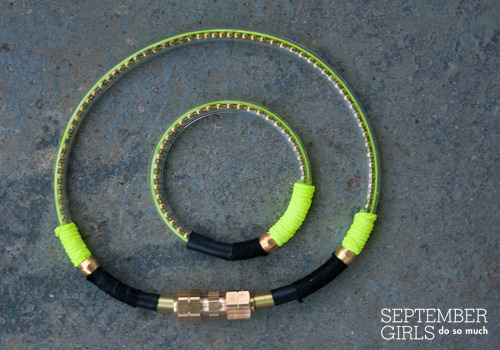 reblog on tumblr
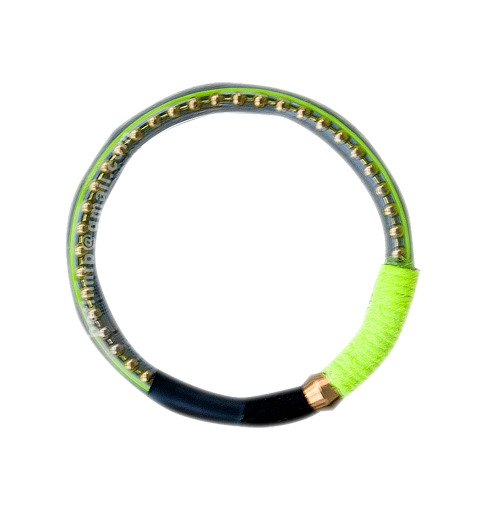
1. Cut a length of tubing you can fit over your hand onto your wrist. (Use a bangle for reference if needed)
2. Use the techniques from the necklace instructions to decorate! To close the bracelet I used a few layers of tape. (If you're feeling fancy you could pick up a second compression unit and use that as a closure again.)
TIP: This would be a fun project to do with a few friends. One pack of tubing could make several necklaces, just make sure to get extras of the other supplies.
ALTERNATIVE IDEA: If the gimp and ball chain are being difficult, use a pipecleaner (easy to find at craft stores) instead. Black would look great with this necklace, but they come in a lot of colors, if you want to mix things up.
Be sure to check out my other projects!
If you make one, feel free to post a photo on the
September Girls Do So Much fan page!
DIY #17
♥ I worked really hard on this tutorial.
It took a long time to prepare.
I wrote out these instructions and took the photos.
So if you see this anywhere else, it's not the original.
1/20/12