Showing posts with label necklace. Show all posts

18 July 2012

DIY: popsicle stick chevron necklace


reblog on tumblr


reblog on tumblr

e a s y ][ 1-2 hours
cost: $10 range
shop at: your house, your freezer, craft store
read: the instructions once though before you get started.

Myself, and a lot of other people apparently, have been keen on chevrons lately. So, how can one be on trend while enjoying summer treats at the same time? Here's the answer.

SUPPLIES

- 10 popsicle sticks
(from popsicles you've eaten, or fresh ones from the craft store)
- 2 paperclips
- pencil
- ruler
- scissors
- hot glue gun
(or another type of sturdy glue you have handy)
- newspaper or junk paper for spilling glue and paint on
- string or chain/jewelry making bits

optional supplies:
- sand paper
- box cutter or xacto knife
- white paint
- colored paint
- paintbrush
- sharpies

0. Soak the popsicle sticks in warm water for 5 minutes. This makes them easier to cut. If you're using popsicle sticks from actual popsicles, add a few drops of dish soap, as this also cleans them. Pat all of the sticks with a paper towel to get rid of excess moisture.

1. Measure three 1 inch sections on each stick, and mark. Be sure to trim off the rounded ends as well.


2. Cut the sticks using scissors. Sometimes it helps to go over your marks with a box cutter before you use the scissors. Don't worry if you mess up a few cuts, 10 sticks gives room for mistakes.


3. If you have sand paper, this is a good time to sand the edges where you cut. For both sides of piece, I ran it over coarse and then ran it over fine grain.


4. Once the pieces of popsicle stick have dried a bit more, apply white paint to the edges. This is especially helpful if your sticks are stained from, well, obviously, popsicles.


5. Using the hot glue gun, create an "L" shape with two of the stick pieces.


6. Applying more hot glue, layer on another piece.


7. And another. You are essentially creating lots of "L" shapes that nest into each other, so keep an eye on how you position them. Don't worry about being perfect, this necklace's look lends well towards the organic feel.


8. Continue layering until it is just about the right height. I used about 8 sticks' worth.


9. Glue two paper clips to the top. (This is where you'll attach the string)


10. Then, layer on the last two stick pieces. Let the pendant dry, carefully picking off any weird bits of glue.


11. You can use paint or sharpie to add a bit of zip to your necklace. Play around with string or chain and presto, you have a necklace! (Make sure it fits around your head and neck!)

reblog on tumblr

TIP: Hot glue works best when you let it heat up for a few minutes. If you use it too soon, it's in this weird state where it clumps and dries too quickly. Always work on a surface like newspaper, where it is ok to spill and drip. Also: seems dumb, but it gets really hot, which is hard to believe until it lands on your fingers. Speaking from experience here, haha.

ALTERNATIVE IDEA: Plain unpainted wood has a nice look to it, as it puts the focus on the form of the necklace. But, as always, color creates a nice effect if you pay attention to spacing and what distance people see the necklace from. Lots of colors together can look epic up close and then when you step back it can look muddy.

Be sure to check out my other projects!

If you make one, feel free to post a photo on the September Girls Do So Much fan page!

DIY #18
♥ I worked really hard on this tutorial. It took a long time to prepare.
I wrote out these instructions and took the photos.
So if you see this anywhere else, it's not the original.
7/18/12

20 January 2012

DIY: industrial necklace


reblog on tumblr


reblog on tumblr

m e d i u m ][ 2-3 hours
cost: $20 range
shop at: your house, hardware store, craft or fabric stores
read: the instructions once though before you get started.

Vinyl tubing is officially awesome, because not only can you wrap things around it on the outside, but you can slide things inside and still see them. This project is pretty relaxed because if you make a mistake or want to re-use the pieces for something else, it's really easy to take apart.

The supply list has lots of parentheses because some of the stuff is a bit weirder than usual.

SUPPLIES

- length of ball chain
(I think the one I used was meant for a bathtub drain, but you can also find it in the jewelry section of a craft store)
- plastic gimp
(The stuff you used at camp to make lanyards. I used fluro yellow)
- thin household string or embroidery floss
(I used black and white, then painted the white with a color. It'd be easier to get already colored string)
- neon acrylic paint
(if you want to paint over string like me. I used fluro yellow)

- 1/4" vinyl tubing
- compression unit
- compression sleeves
(They were all next to each other at Home Depot when I found them. A clerk will come over and help if you stand there staring for awhile, haha)

- double-sided tape (for the string wraps)
(scotch brand is good, or you can use the kind mentioned in my foam clutch tutorial)
- liquid household glue (for the string wraps)
- electrical tape or duct tape (I used black)
- scissors
- wire cutters (to cut the ball chain)
- ruler
- measuring tape
- small paintbrush

0. Unwrap and play with the pieces and get familiar with how they work for a few minutes.

1. Measure the circumference of your neck. Add 1" or so to that number. Or, you could take the measurement of a choker-style necklace you have and use that number.

2. Cut a piece of vinyl tubing at that length. (I noticed mine had some funny "NOT FOR ICE MAKER" text printed on it, decided to embrace it, but feel free to be picky and avoid that part when you cut your pieces.) Because it comes all wound up, it lends to the circular shape well.

3. Attach one half of the compression unit to the end of the cut piece of vinyl tubing by sliding in the skinny bit at the end.
 

 4. At the other end of the tube, feed in the ball chain and gimp. I believe I did one after the other, but it might be possible to send them in at once. This step can take a bit of time, but stick with it!

 5. Trim the gimp and ball chain once it's all the way through and hits the compression unit. Slide on the compression sleeves (they look like beads, right?) and slide in the other half of the compression unit.

 6. To finish up, wrap little pieces of tape around parts of the necklace, and doublesided tape (or glue) / string wraps as well. (If you remember the BHBN tutorial, these string wraps are a lot like those.) I find that paint worked well on the string but not so much on the other surfaces.

 7. Doneski! The compression unit is the fastener of the necklace.

BONUS BRACELET


reblog on tumblr

1. Cut a length of tubing you can fit over your hand onto your wrist. (Use a bangle for reference if needed)

2. Use the techniques from the necklace instructions to decorate! To close the bracelet I used a few layers of tape. (If you're feeling fancy you could pick up a second compression unit and use that as a closure again.)


TIP: This would be a fun project to do with a few friends. One pack of tubing could make several necklaces, just make sure to get extras of the other supplies.

ALTERNATIVE IDEA: If the gimp and ball chain are being difficult, use a pipecleaner (easy to find at craft stores) instead. Black would look great with this necklace, but they come in a lot of colors, if you want to mix things up.

Be sure to check out my other projects!

If you make one, feel free to post a photo on the September Girls Do So Much fan page!

DIY #17
♥ I worked really hard on this tutorial.
It took a long time to prepare.
I wrote out these instructions and took the photos.
So if you see this anywhere else, it's not the original.
1/20/12

01 February 2011

DIY: the BHNB


BELT-HEADBAND-NECKLACE-BRACELET
aka the "BHNB"
m e d i u m ][ 1-2 hours
cost: $10-15 for several
shop at: your house, a craft store, hit up sales if you can
read: the instructions once though before you get started or buy supplies

The BHNB is really handy, you can wear it a bunch of different ways. It's easy to pack for trips, and adds interest to even the simplest outfit.

SUPPLIES (mix and match to your liking)

STRING
- hemp
- suede cord
- leather cord
- regular ol' hardware store or kite string
- embroidery floss
- thin ribbon
- fabric strips
- really, any string you like

BEADS
- pony beads
- plastic beads
- wooden beads
- natural beads
- metal beads
- really, any beads you like

TRINKETS
- 1/2" or bigger jump rings (usually come in gold or silver)
- charms
- little jump rings to hold charms (optional)
- feathers
- elastic hair tie

BASICS
- workspace
- background music
- scissors
- tape
- liquid glue (like elmer's)
- ability to braid and tie knots

PLANNING + ADVICE ABOUT MATERIALS

- Think about what colors you want to focus on. I find that 1 to 4 neutrals mixed with 1 to 4 colors looks interesting yet well-thought out. I picked browns, whites, blacks, gold, blues, greens, and yellows. Every material I used was one of those colors. However, if you want a rainbow, or you want everything to be one color, go for it!

- You can get lots of variety for less money by buying bags of cheaper beads with multiple colors in them, followed by a few strands of special beads. The special beads will look even nicer with smaller/plain beads next to them.

- Play with size and texture. Tiny metal beads will look rare next to bigger wooden beads, as would shiny next to dull. Give the eye lots to look at within a few basic string and bead choices!

- Don't overdo it with the beads, the BHNB is going to feel heavy if there's a pound of beads on your head or around your neck.

- Make sure at least one kind of string you get is small enough to go through the smallest bead's hole.

- Make sure all of your beads are small enough to fit through your biggest jump ring.

- If bigger beads keep falling over your knots, put a little bead after the big bead, then tie the knot. That should keep it in place.

- Thicker string makes for a more durable/thicker final product. If you use only embroidery floss for the braid, it's going to end up being a long, thin friendship bracelet.

- Avoid itchy string. I have yet to come across an itchy bead.

- Don't write off cheaper materials right away. I fell in love with boring hardware store string, because it's durable and you get a lot of it to play with on one roll!

- Get long enough pieces of string to go around your hips, plus some. The extra is where the beads go, and where you tie knots/close it.

- Braids don't have to be just 3 pieces of string. Pair smaller strings together and braid it like it's one string.

- Use tiny beads or knots to space out your bead layout

- Buddy up beads of the same color or size to create new shapes

- Not every end piece has to be covered in beads. Bits with no beads create a breather for the eye and make the beaded parts pop!

- Odd numbers look more appealing than even, symmetry is boring

- Don't worry about assembling this perfectly! Rough edges, loose strings, and awkward knots give it character.

THE BASIC OUTLINE OF HOW TO MAKE IT
Knots can be un-tied and re-tried.
Don't be afraid to play around and experiment, that's how you discover cool ideas!

1. Pick out the three strings you want to braid. Bundle them up and tape them at the top, to a table or other surface edge. Leave a few inches at the top before where you start the braid. This is where beads and decorations will go later.

2. Braid until you get near the end. Stop, and leave a few inches at the end. More beads will go there.


3. Instead of tying knots at both ends, grab 2 lengths of scrap string, 6 or 7 inches each. Knot one where you'd like to secure the braid at the top, and wrap it tightly around the braid, again and again. Pull it through one loop to finish the wrap. Dab with glue to secure it further. Repeat at bottom. These wraps also make great decorative elements.


4. On one end, tie two of your big jump rings to one end of the braid, right next to each other on the same loop.


5. On both ends, place beads and other decorations, using knots to keep them in place.

6. Slip an elastic hair tie on one side of the BHNB. Wind it multiple times like when you make a ponytail. Touch up glue and inspect/edit your work.

7. Done!


BELT

- The big jump rings you attached allow for an extra way to secure the belt function.

- If you've ever had a preppy ribbon belt, you know how this works. Hold the belt around your waist. The other end of the BHNB goes through both rings, then back through the bottom loop.


HEADBAND

- Wrap it around your head however many times you want, and tie a knot to secure it, or utilize the elastic or jump rings.

- Wear it like a traditional headband, or wear it around your forehead the "hippie/rockstar" way

- Let the beads hand loose or tuck them in


NECKLACE

- Swoosh it around your neck, then tie a loose knot or push the other end through the elastic

- Place the knot near your neck, in the middle, or near the end

- Hang the ends next to each other evenly, or let one hang above the other


BRACELET

- Wrap and wrap and wrap it around your wrist, pushing it through the rings or not, securing it with a knot, a tuck, or the elastic

- Loose or snug, your call


ALTERNATIVE IDEAS:

- Recycle old jewelry and weave it into the project. I bet broken bracelets would look cool alongside the beads, or old rings instead of jump rings.

- If you're feeling adventurous, slip beads onto the braid as you braid, making them part of the rope. Just keep in mind whatever is part of the braid will be in contact with your skin or hair. I decided against doing this since I hate having little bumps pressed against my skin, haha

- Use the BHNB as ribbon around a gift for a friend…bonus gift!

be sure to check out my other projects!
 
all these photos are on my tumblr if you want to reblog.

DIY #13
♥ I worked really hard on this tutorial. It took a long time to prepare.
I wrote out these instructions and took the photos.
So if you see this anywhere else, it's not the original.
2/1/11

27 January 2011

DIY: jumbow necklace


e a s y ][ 45 minutes
cost: $5-10
shop at: craft and fabric stores, places that sell accessories
read: the instructions once though before you get started
also consider reading the instructions from my statement bow cuff tutorial to review folding techniques
 
A fabulous standout piece. Just like the statement bow cuff, it's not an ordinary shoelace bow. All it takes is a simple 3 shapes and a chain.
 
SUPPLIES
- template pieces, cut out
click here to download the template

- ability to sew whip stitches
(google it if you don't know how)
- necklace chain with a clasp
- twenty inches of 3" grosgrain ribbon that looks the same on both sides
- sewing needle
- thread in a color that's similar to the ribbon
- scissors or xacto knife
- bottle of fraycheck or clear nail polish
- ruler
 
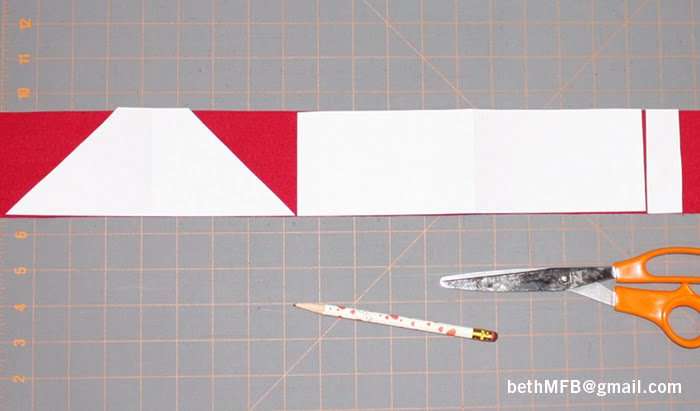
1. Lay out the ribbon on your workspace. Lay the 3 pattern pieces over the ribbon.


2. Cut out the 3 shapes with your scissors or, a ruler and xacto. I use a rotary cutter. This should take 6 cuts, total.


3. Lightly dab all 6 edges that you cut with fraycheck or clear nail polish. This will keep the edges from unravelling. Let dry.

4. Fold the top piece in half, hamburger style. Whip stitch it together down the open side.


5. Move the stitches to the center back. Set aside.


6. Now it's time to fold the ribbon, to create the bow shape. It's a little confusing, but don't worry, once you do it, you'll be able to do it again and again.

7. Take the bottom piece, and fold the top down so it touches the bottom edge. Then, fold the top half up again, onto itself. Flip over, and fold the bottom half onto itself. Place something on top of it so it stays still while you move to the next step.


8. Take the top piece that you just finished sewing, and fold it just like you did in step 6. It will look different since the bottom is a trapezoid and the top is a rectangle, but the folds are the same.


9. Thread your sewing needle again. Pick up the bottom piece, and poke a hole through the middle, bringing the thread through up to the top.


10. Poke another hole through the middle of the top piece. Make sure both pieces are facing forward. Tighten the thread to pinch the top and bottom pieces together. Cut and tie the thread. If it looks loose, that's ok, we haven't added the "knot" yet.


11. Grab the third and final piece. Wrap it around the center of the bow, covering where you strung them together. Whip stitch it closed, like you did with the big top piece in step 4. Spin the knot so the stitches are in back.


12. Open the chain and string it through the top of the knot. Done!

 
TIP: Practice by folding paper first if you like. It won't look like the ribbon version when you're done, but you'll understand how the folds work together.

ALTERNATIVE IDEAS:

- Clip extra necklaces or pins/rings on your chain to give it a draped look
- Slide/stitch extra smaller ribbons or decorations through the bottom of the knot
- Instead of a chain, you could use ribbon, beads, or string
- Experiment with different types/sizes of ribbon or materials
- Skip the bottom trapezoid piece for a plain bow-tie look, or keep bottom piece loose so you can wear it with or without
 
be sure to check out my other projects!


DIY #12
♥ I worked really hard on this tutorial. It took a long time to prepare.
I wrote out these instructions and took the photos.
So if you see this anywhere else, it's not the original.
1/27/11